How to Sign Up with Archera
Get started with Archera’s platform to begin optimizing your cloud costs through intelligent commitment management
Getting started with Archera is straightforward and designed to have you optimizing costs within minutes. Follow this guide to set up your account and begin your cloud cost optimization journey.
Prerequisites
Before getting started, ensure you have:
Cloud Account Access
Account Permissions
Cloud account with billing access (AWS, Azure, or GCP)
Ability to create necessary integrations
Cost and usage data access
Cost Visibility Setup
Cost Management Tools
AWS: Cost and Usage Reports (CUR) configured
Azure: Cost Management + Billing enabled
GCP: Billing export configured
Basic understanding of your spending patterns
Basic Understanding
Cloud Knowledge
Familiarity with your cloud services
Understanding of your workload patterns
Desire to optimize cloud costs
Baseline Analysis
Current State Knowledge
Knowledge of top spending services
Understanding of usage patterns
Existing cost monitoring practices
Recommended: Set up native cost management tools (AWS Cost Explorer, Azure Cost Management, GCP Billing) before connecting to Archera. This provides baseline understanding and enables better optimization decisions.
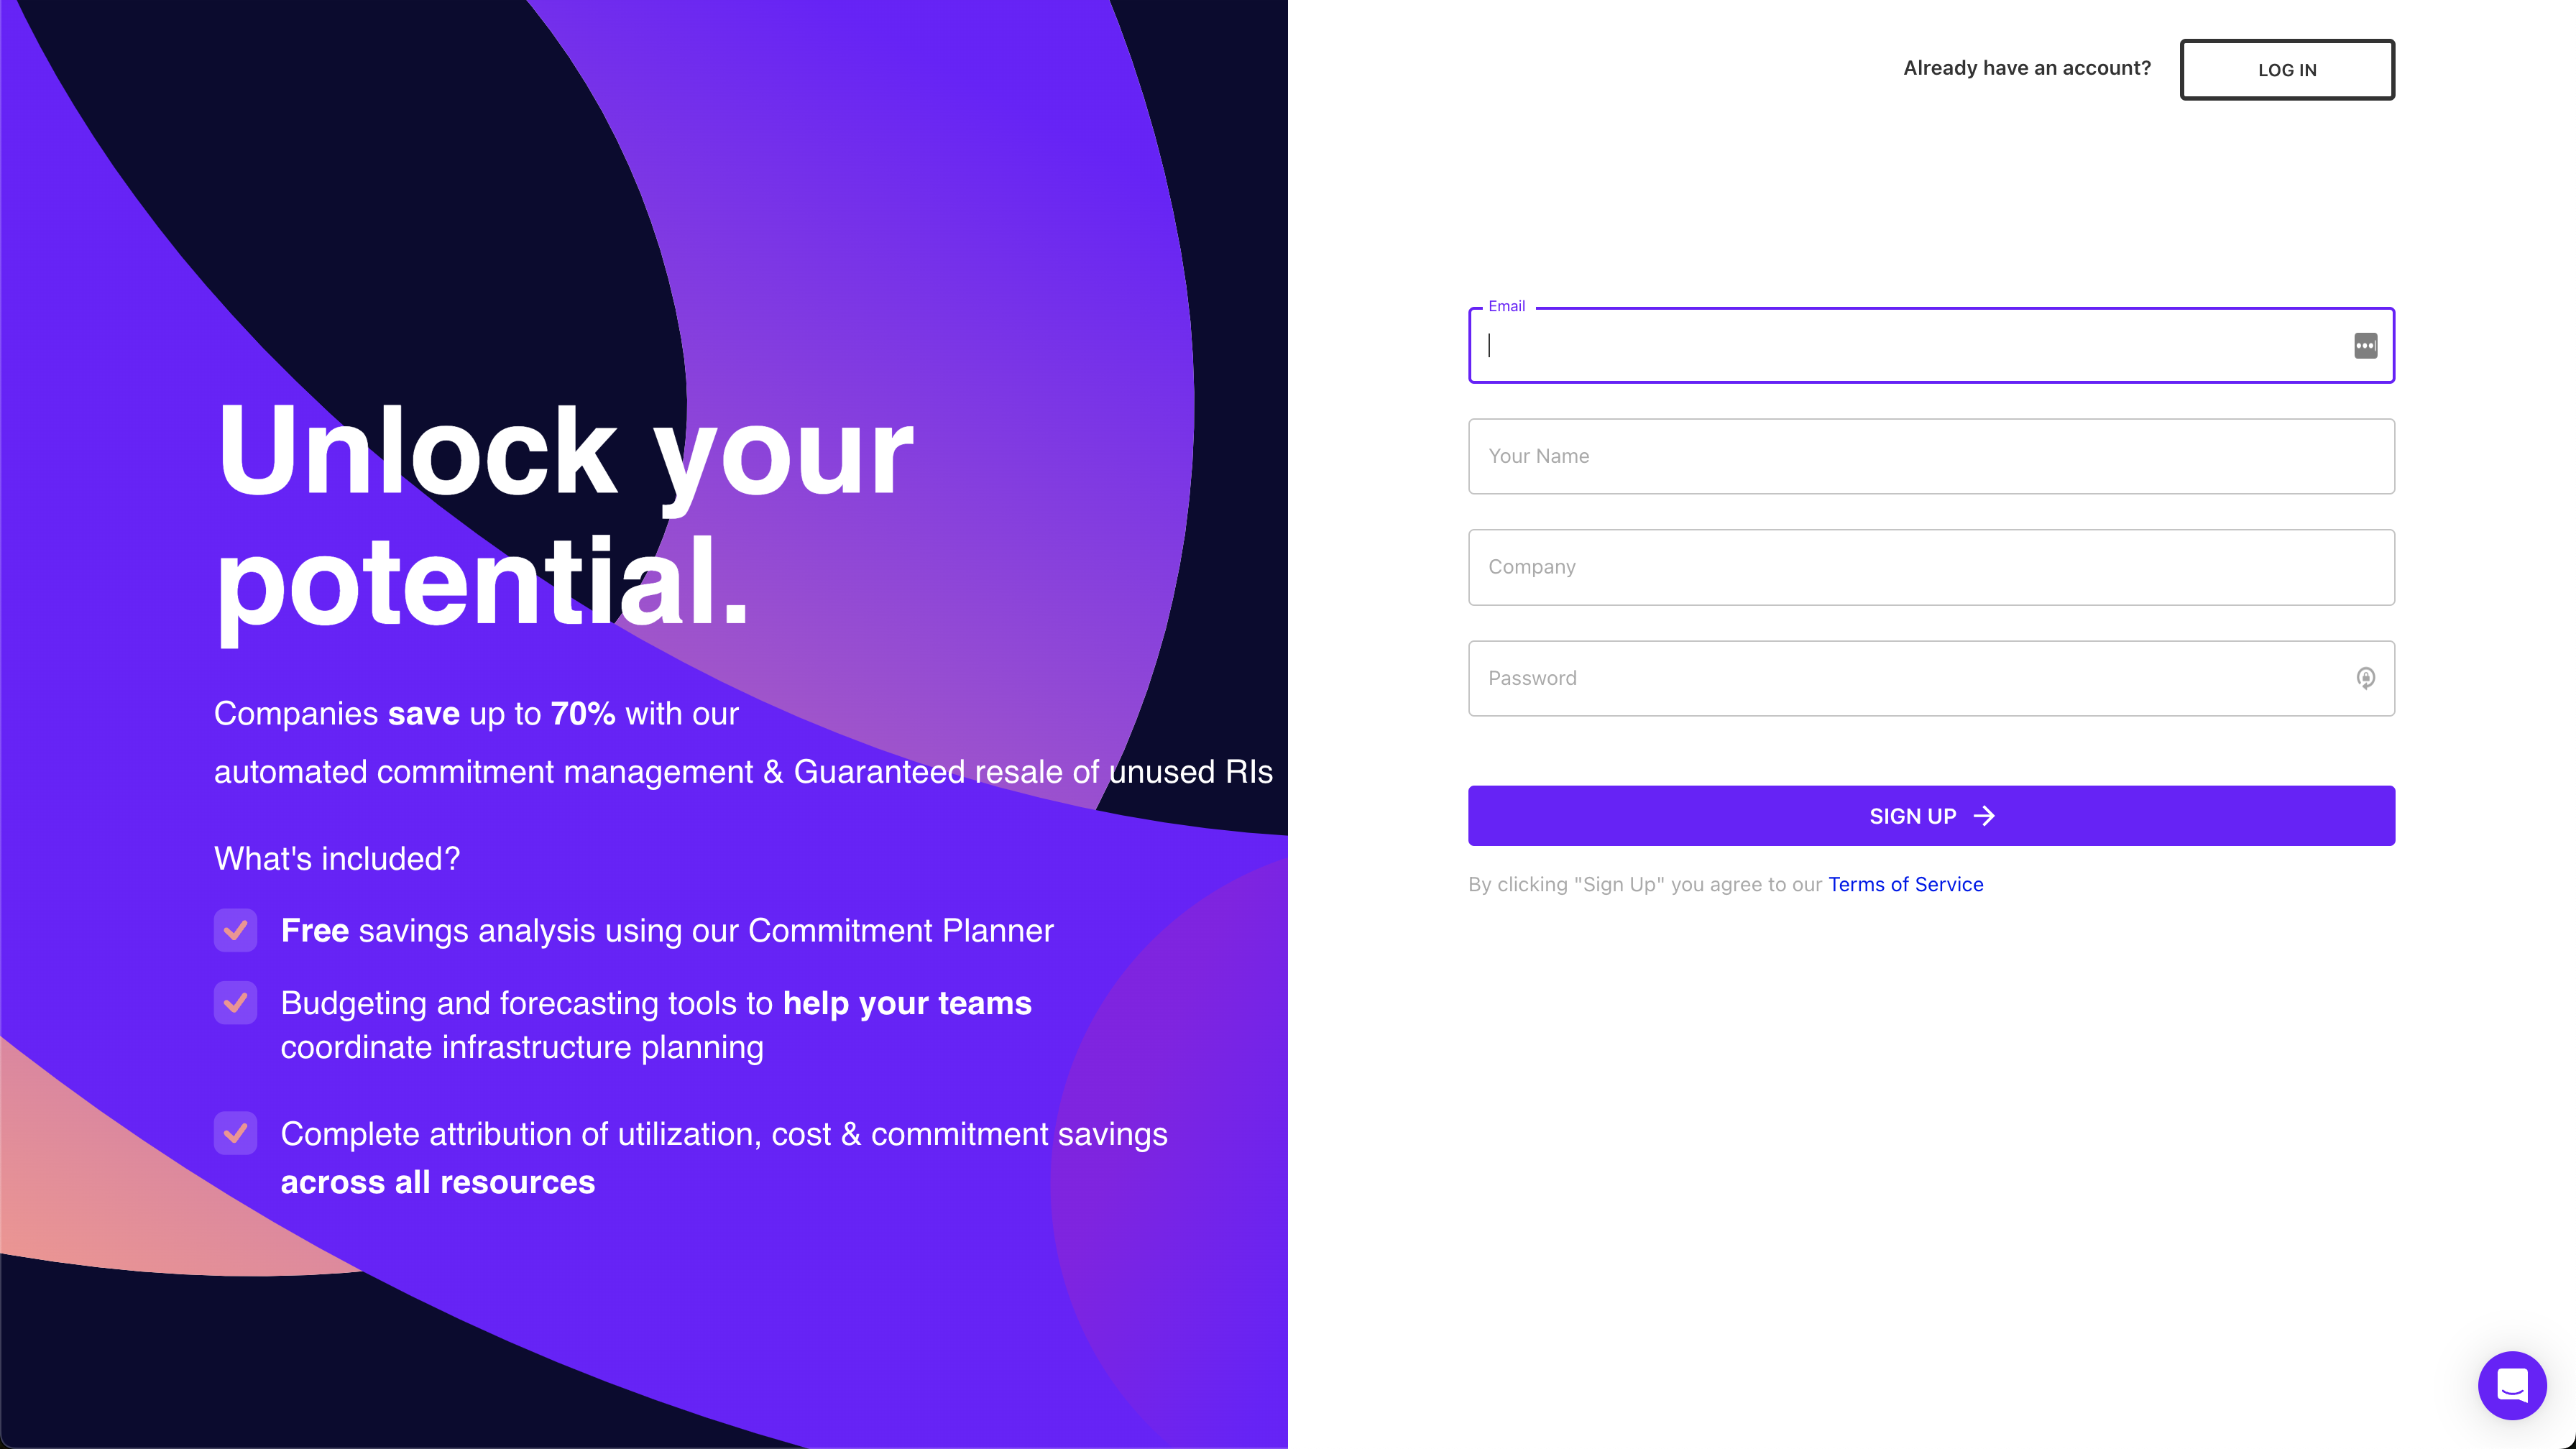
Step 1: Create Your Archera Account
Provide Account Details
Enter your email, create a password, and provide basic organization information
Verify Your Email
Check your inbox for a verification email and click the confirmation link
Complete Profile Setup
Add your name, role, and organization details to complete your profile
Step 2: Connect Your Cloud Provider
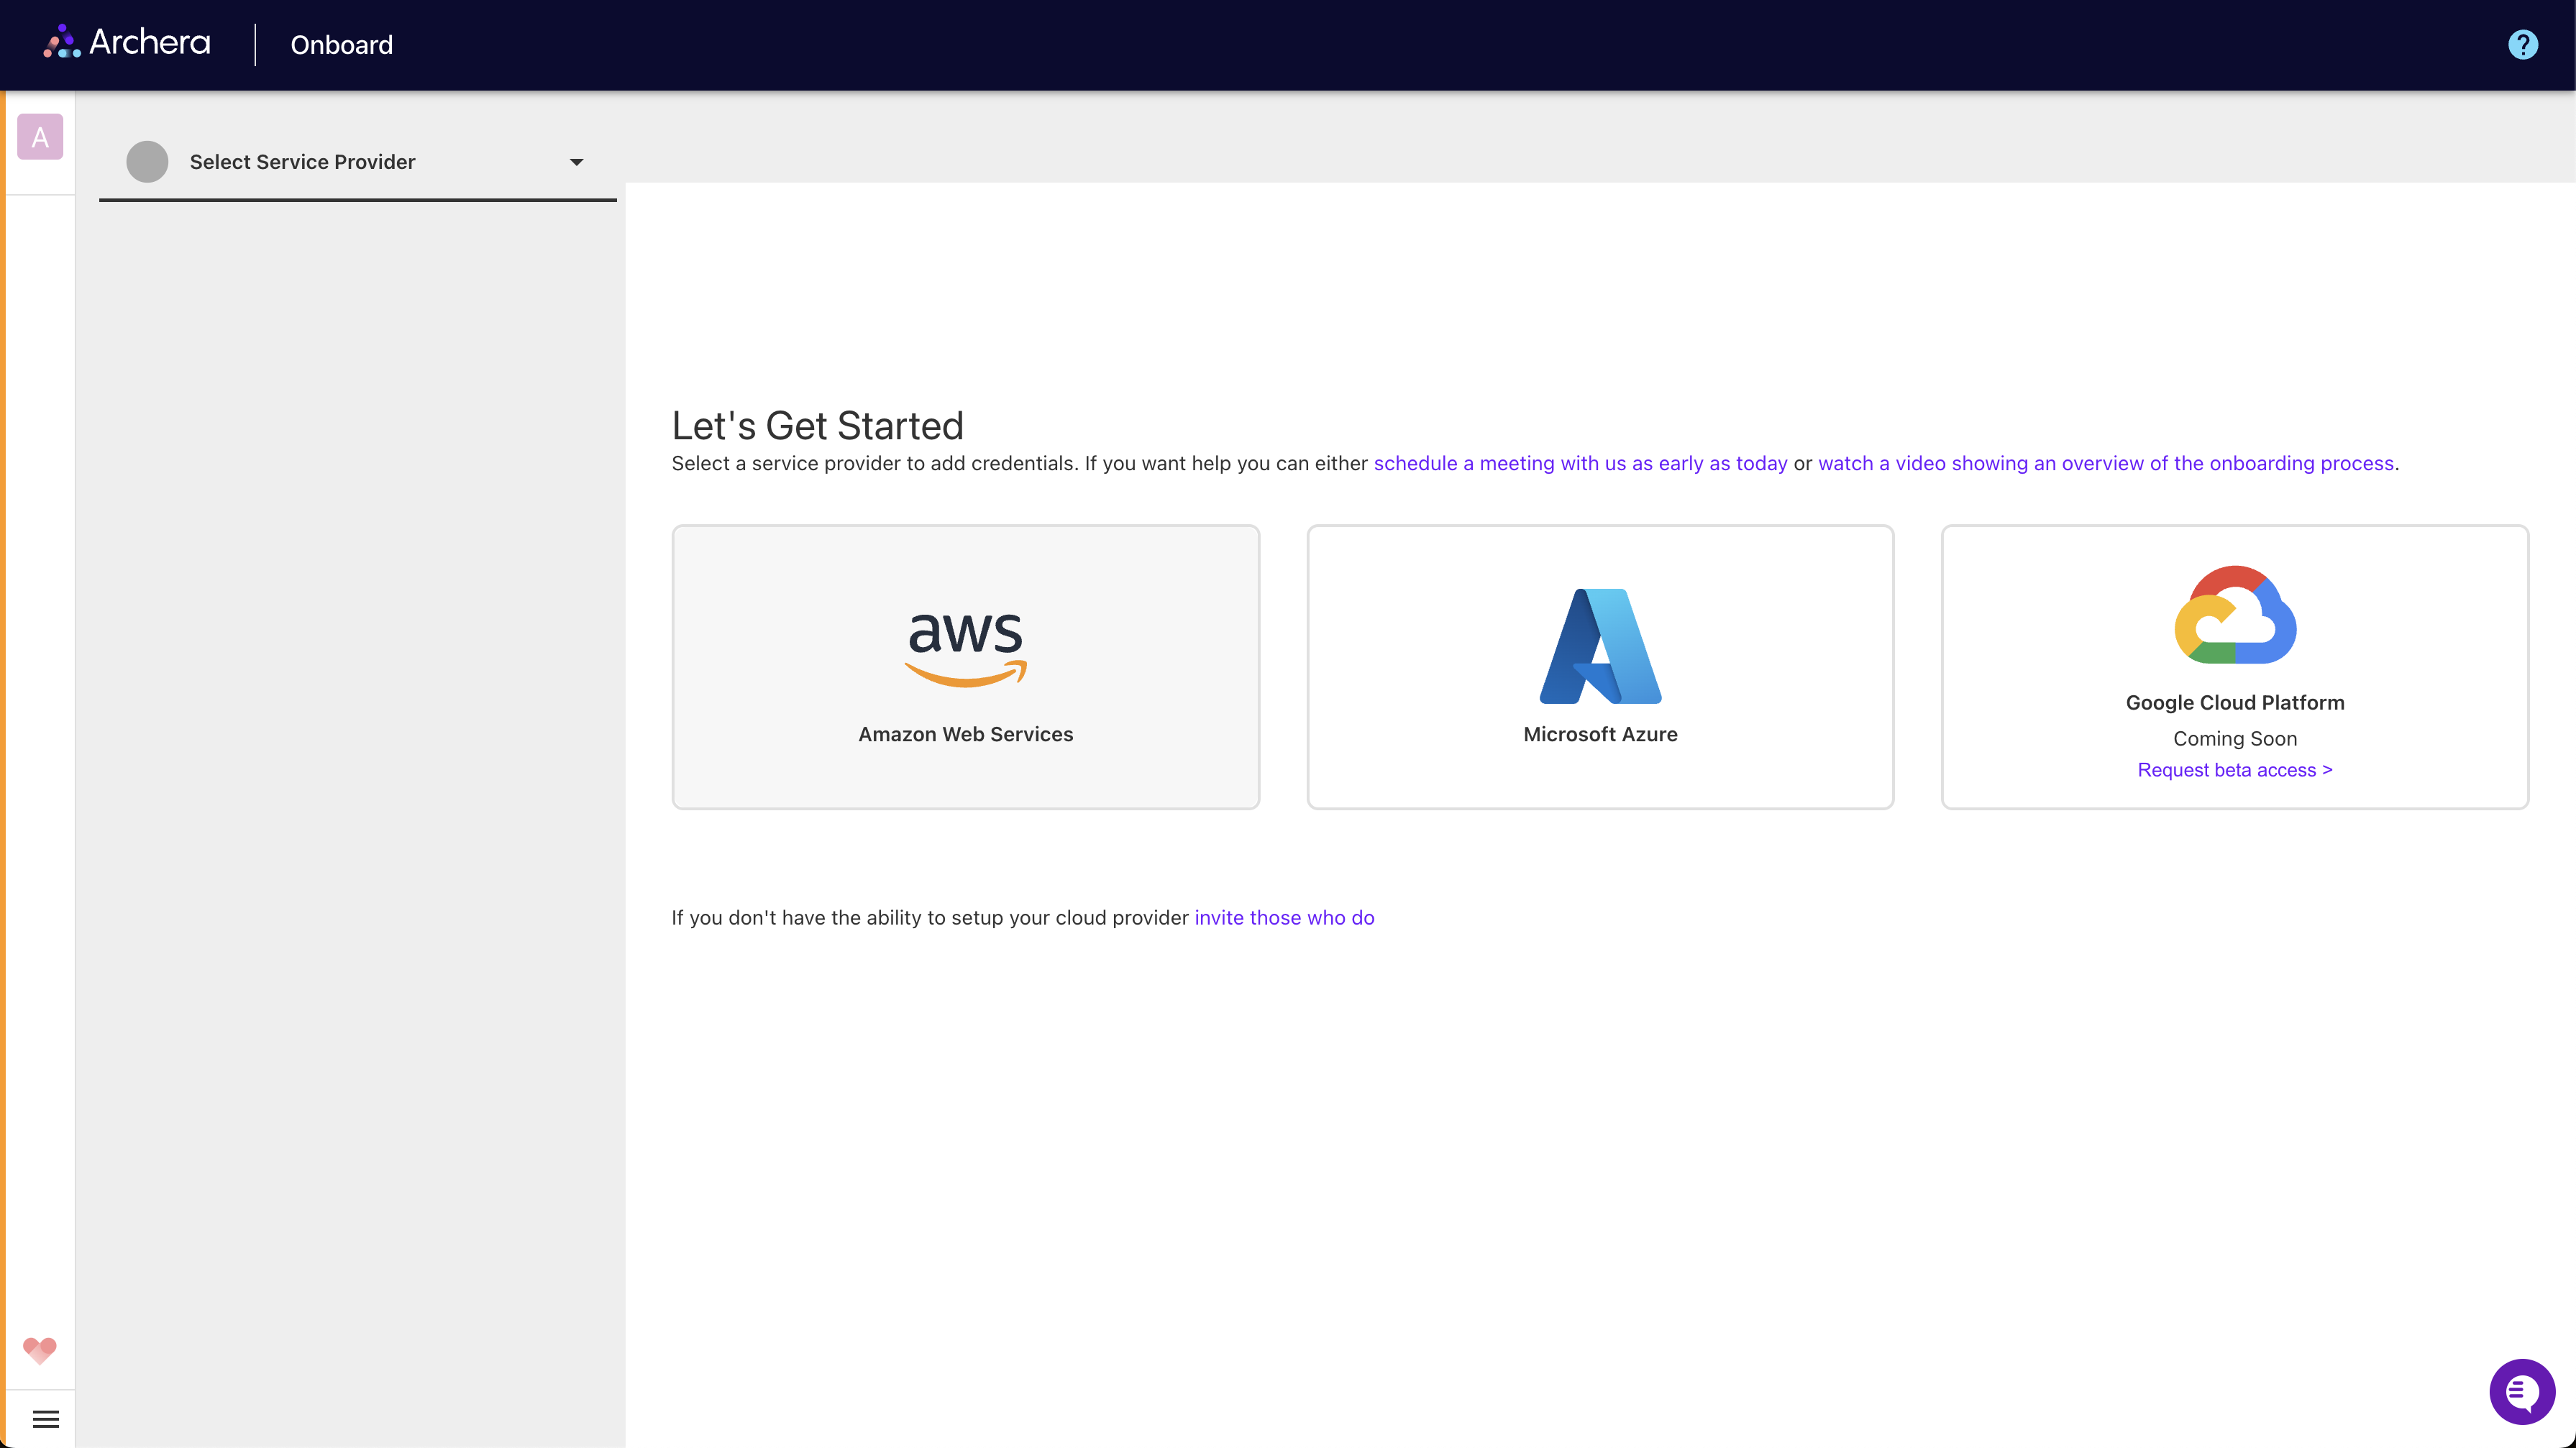
Once your account is created, you’ll need to connect your cloud environment. Archera supports AWS, Azure, and Google Cloud Platform.

Cloud Provider Integration
Archera uses secure, native integration methods for each cloud provider:
AWS Integration
CloudFormation Deployment:
Launch CloudFormation Stack: Pre-configured template for secure integration
IAM Role Creation: Read-only role for cost analysis
Minimal Permissions: Only cost optimization permissions
No Infrastructure Access: Never accesses running workloads

CloudFormation Screenshot
Azure Integration
Service Principal Setup:
App Registration: Create service principal in Azure AD
Reader Permissions: Billing and cost management access
Secure Connection: OAuth-based authentication
Cost Data Only: No access to operational resources
Google Cloud Integration
Service Account Configuration:
Service Account: Create dedicated service account
Billing Permissions: Cloud billing and asset inventory access
JSON Key: Secure key-based authentication
Read-Only Access: No modification permissions
What Archera Accesses
Required Data Access:
Cost and Usage Data: To analyze spending patterns
Resource Information: To recommend appropriate commitments
Billing Information: To calculate potential savings
What Archera NEVER Accesses:
Your application data or workloads
Running instances or services
Security configurations
Any operational infrastructure
Connection Process
Select Cloud Provider
Choose your cloud provider (AWS, Azure, or Google Cloud) from the integration options
Follow Provider Instructions
Each provider has specific integration steps guided by the platform
Review Permissions
Review the access permissions that will be granted
Complete Integration
Confirm the connection and verify successful integration
Step 3: Initial Cost Analysis
After connecting your cloud account, Archera will begin analyzing your usage:
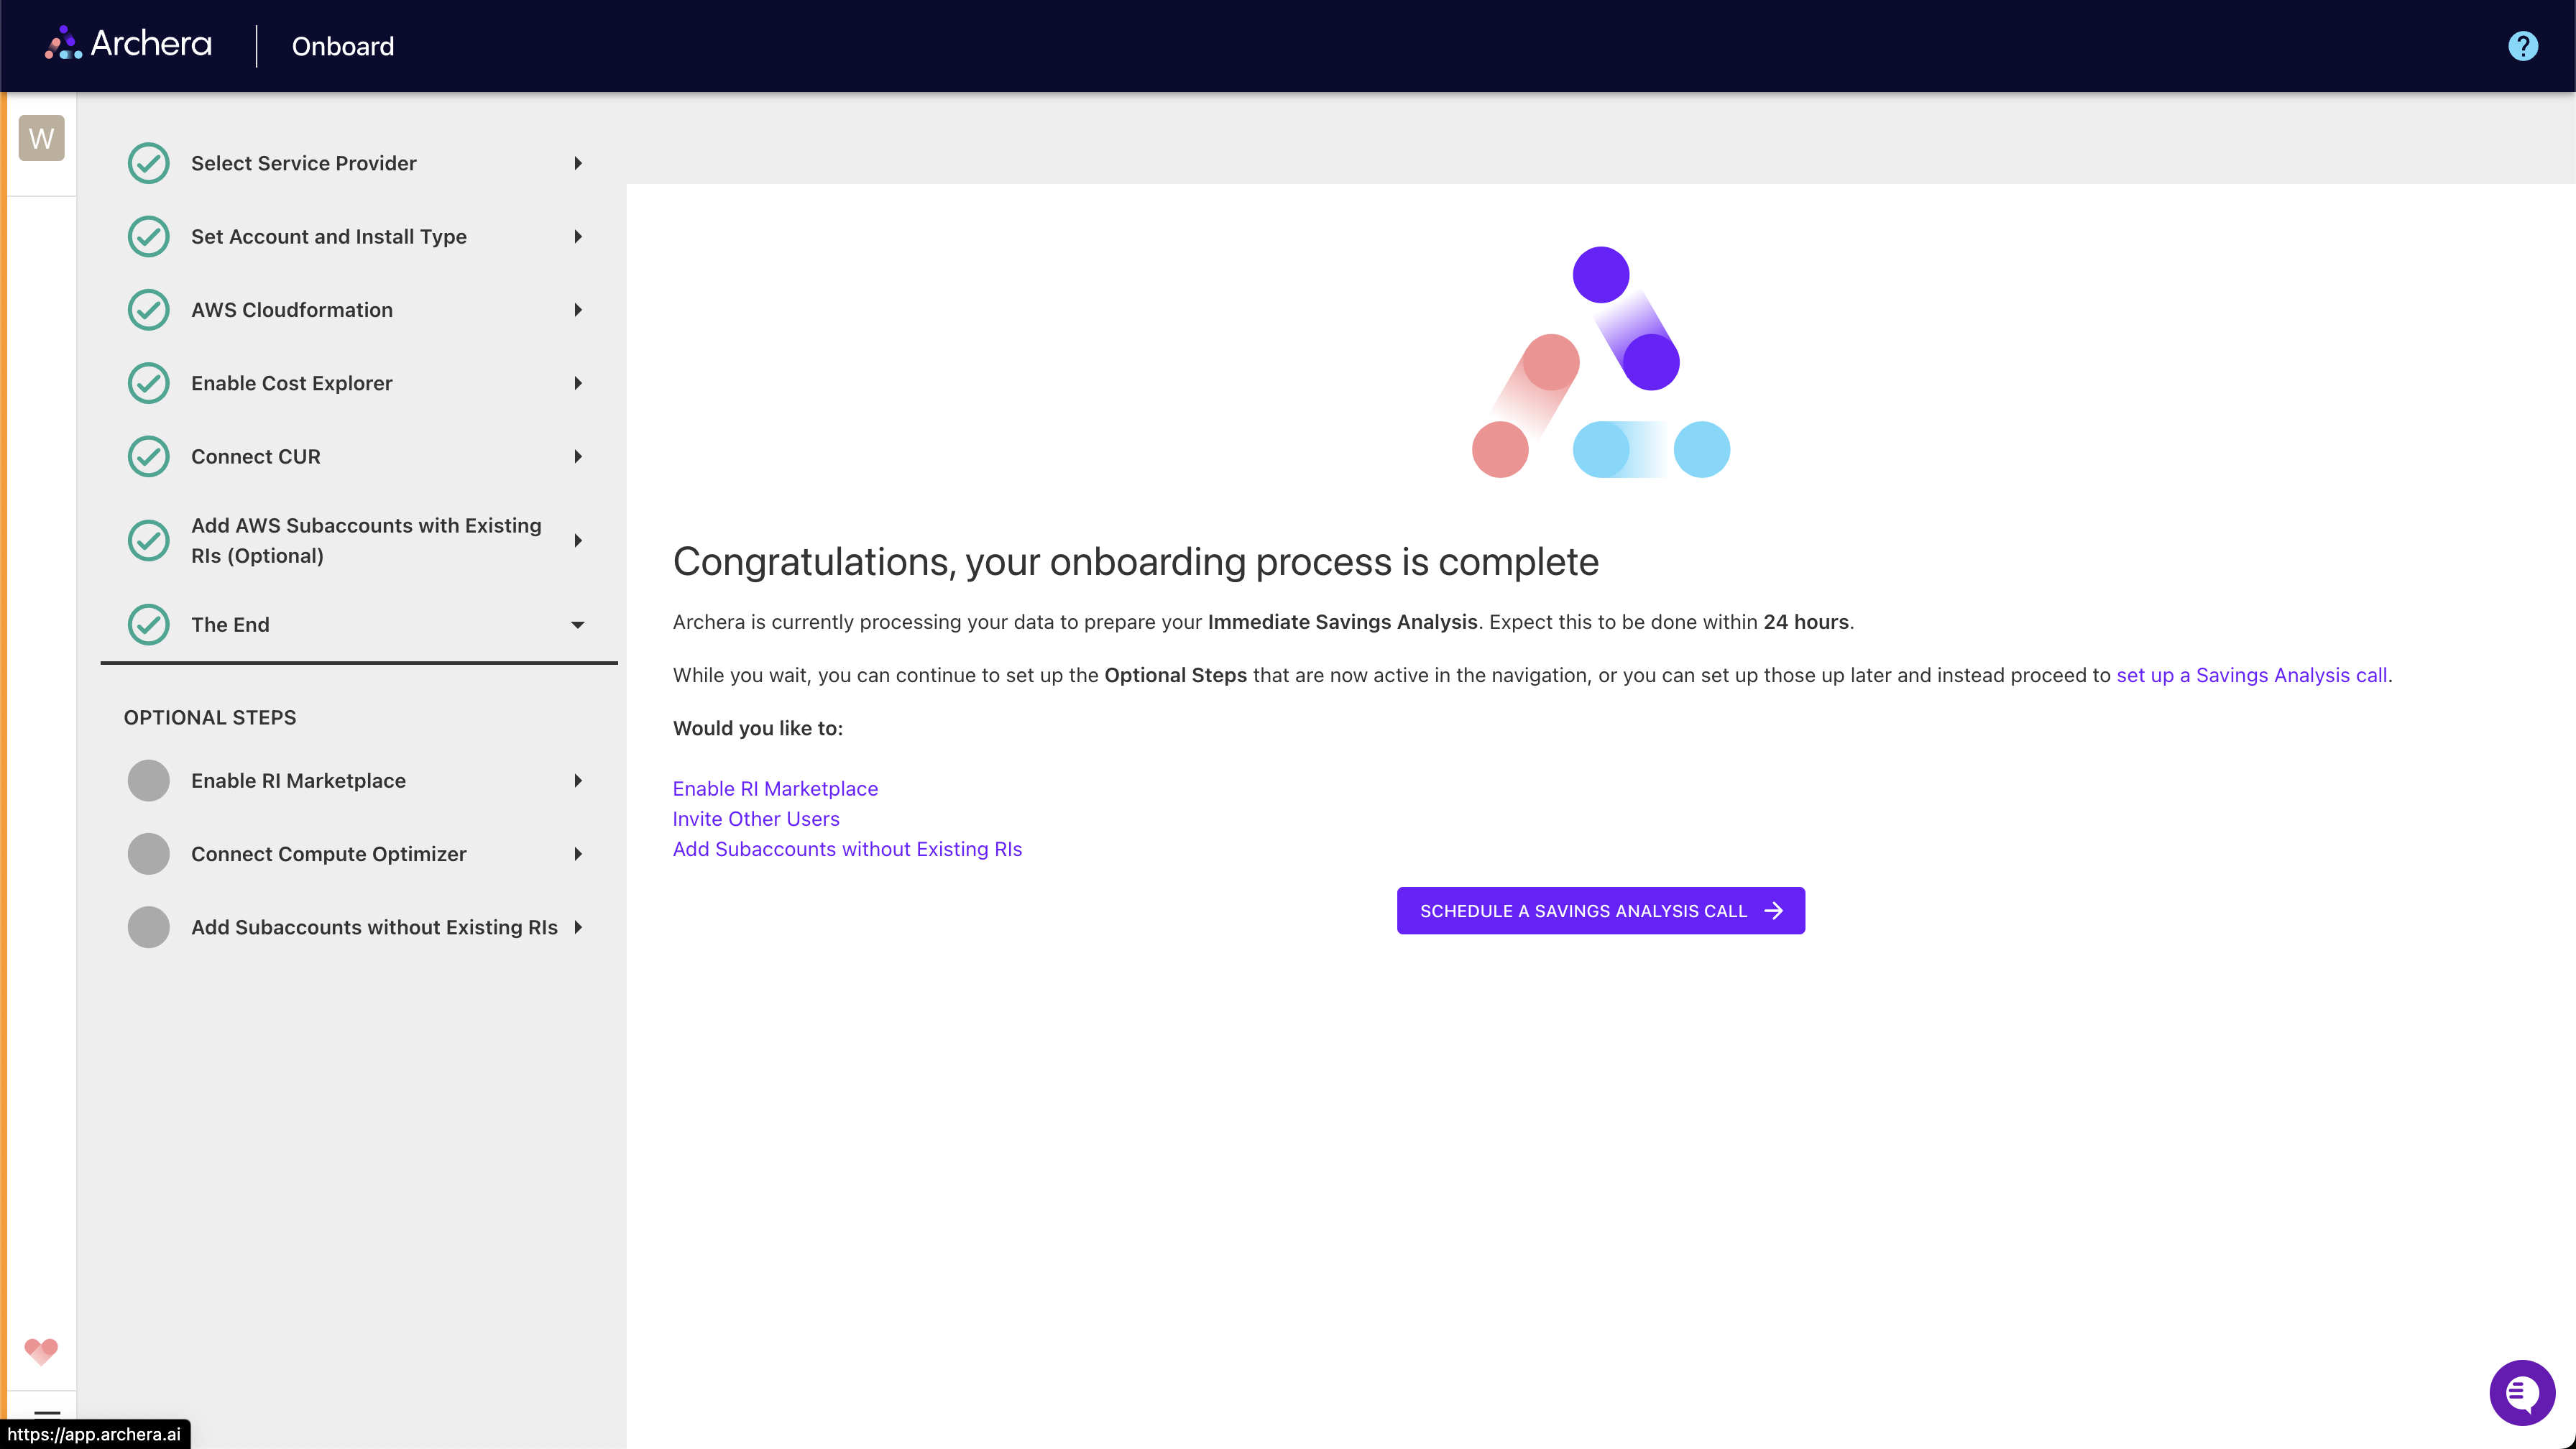
Onboarding Process: Connection is completely free and purely to access your billing data so Archera can make accurate recommendations based on your actual usage numbers. After connecting, it takes 24-48 hours to unlock the full platform as historical data is processed.
Data Processing Timeline
Initial Connection
5-10 Minutes
Account connection verification
Basic cost data import
Infrastructure discovery
Full Platform Access
24-48 Hours
Historical usage analysis
Savings opportunity identification
Complete platform functionality unlocked
What You’ll See First
Once initial processing completes, you’ll have access to:

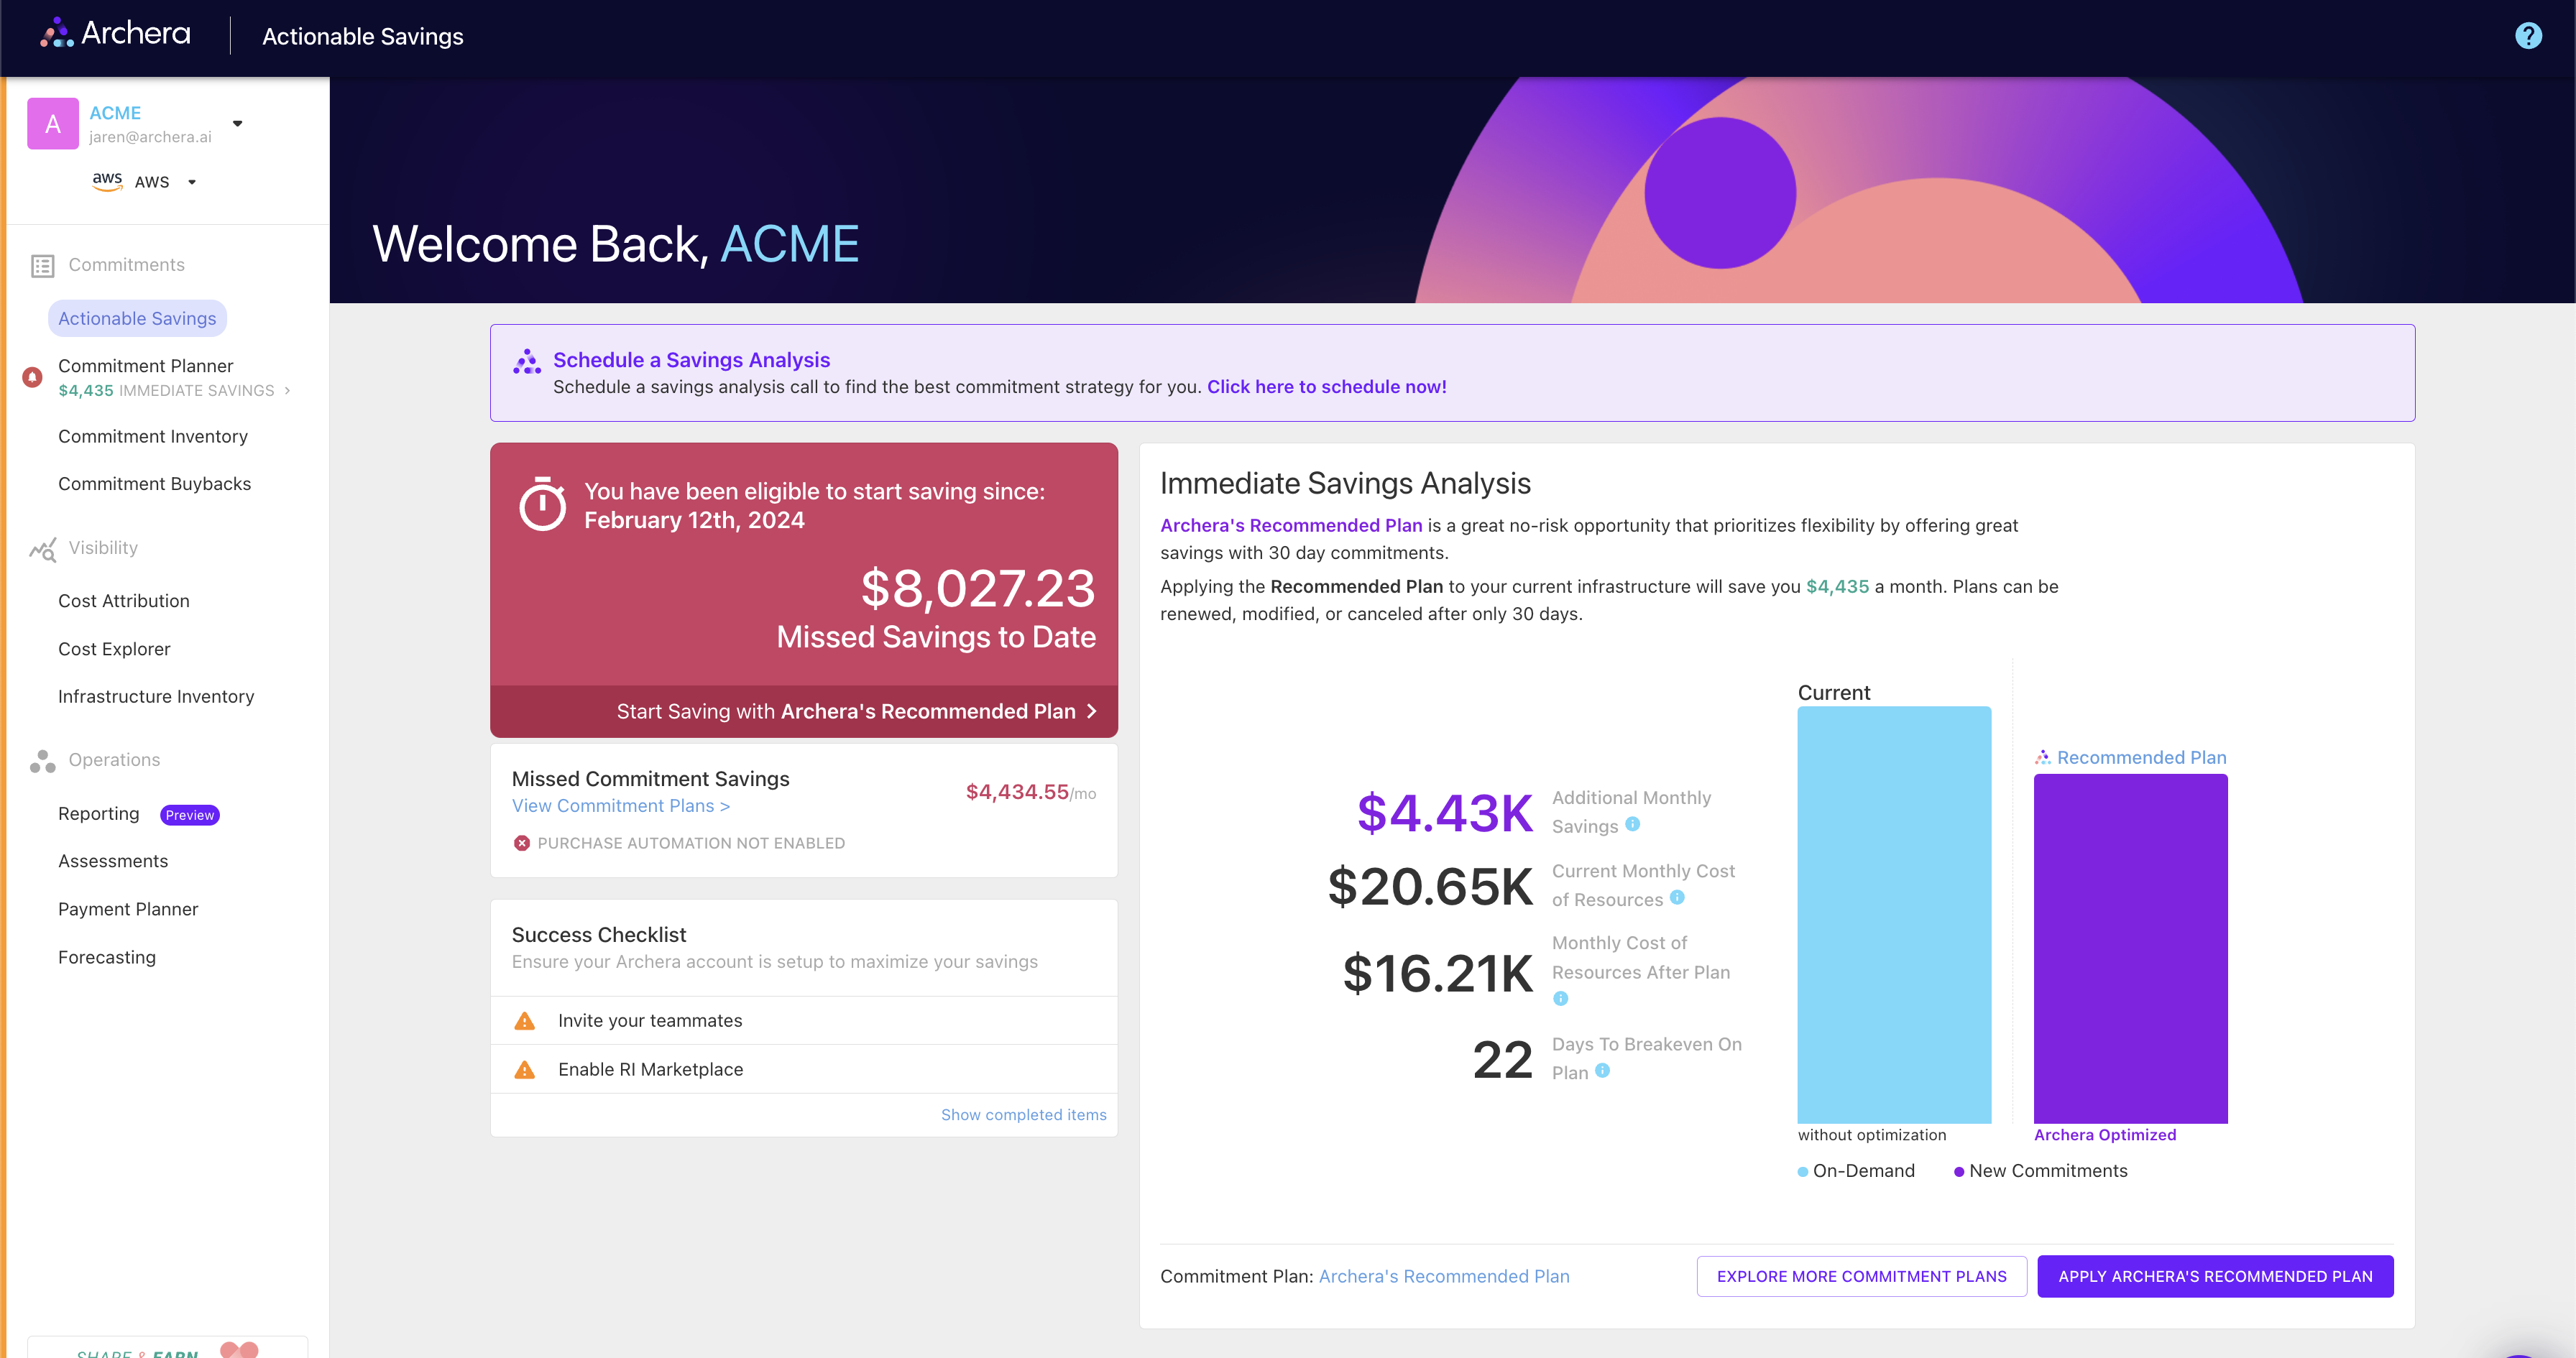
Immediate Savings Analysis: Quick wins for covering on-demand usage with short-term commitments
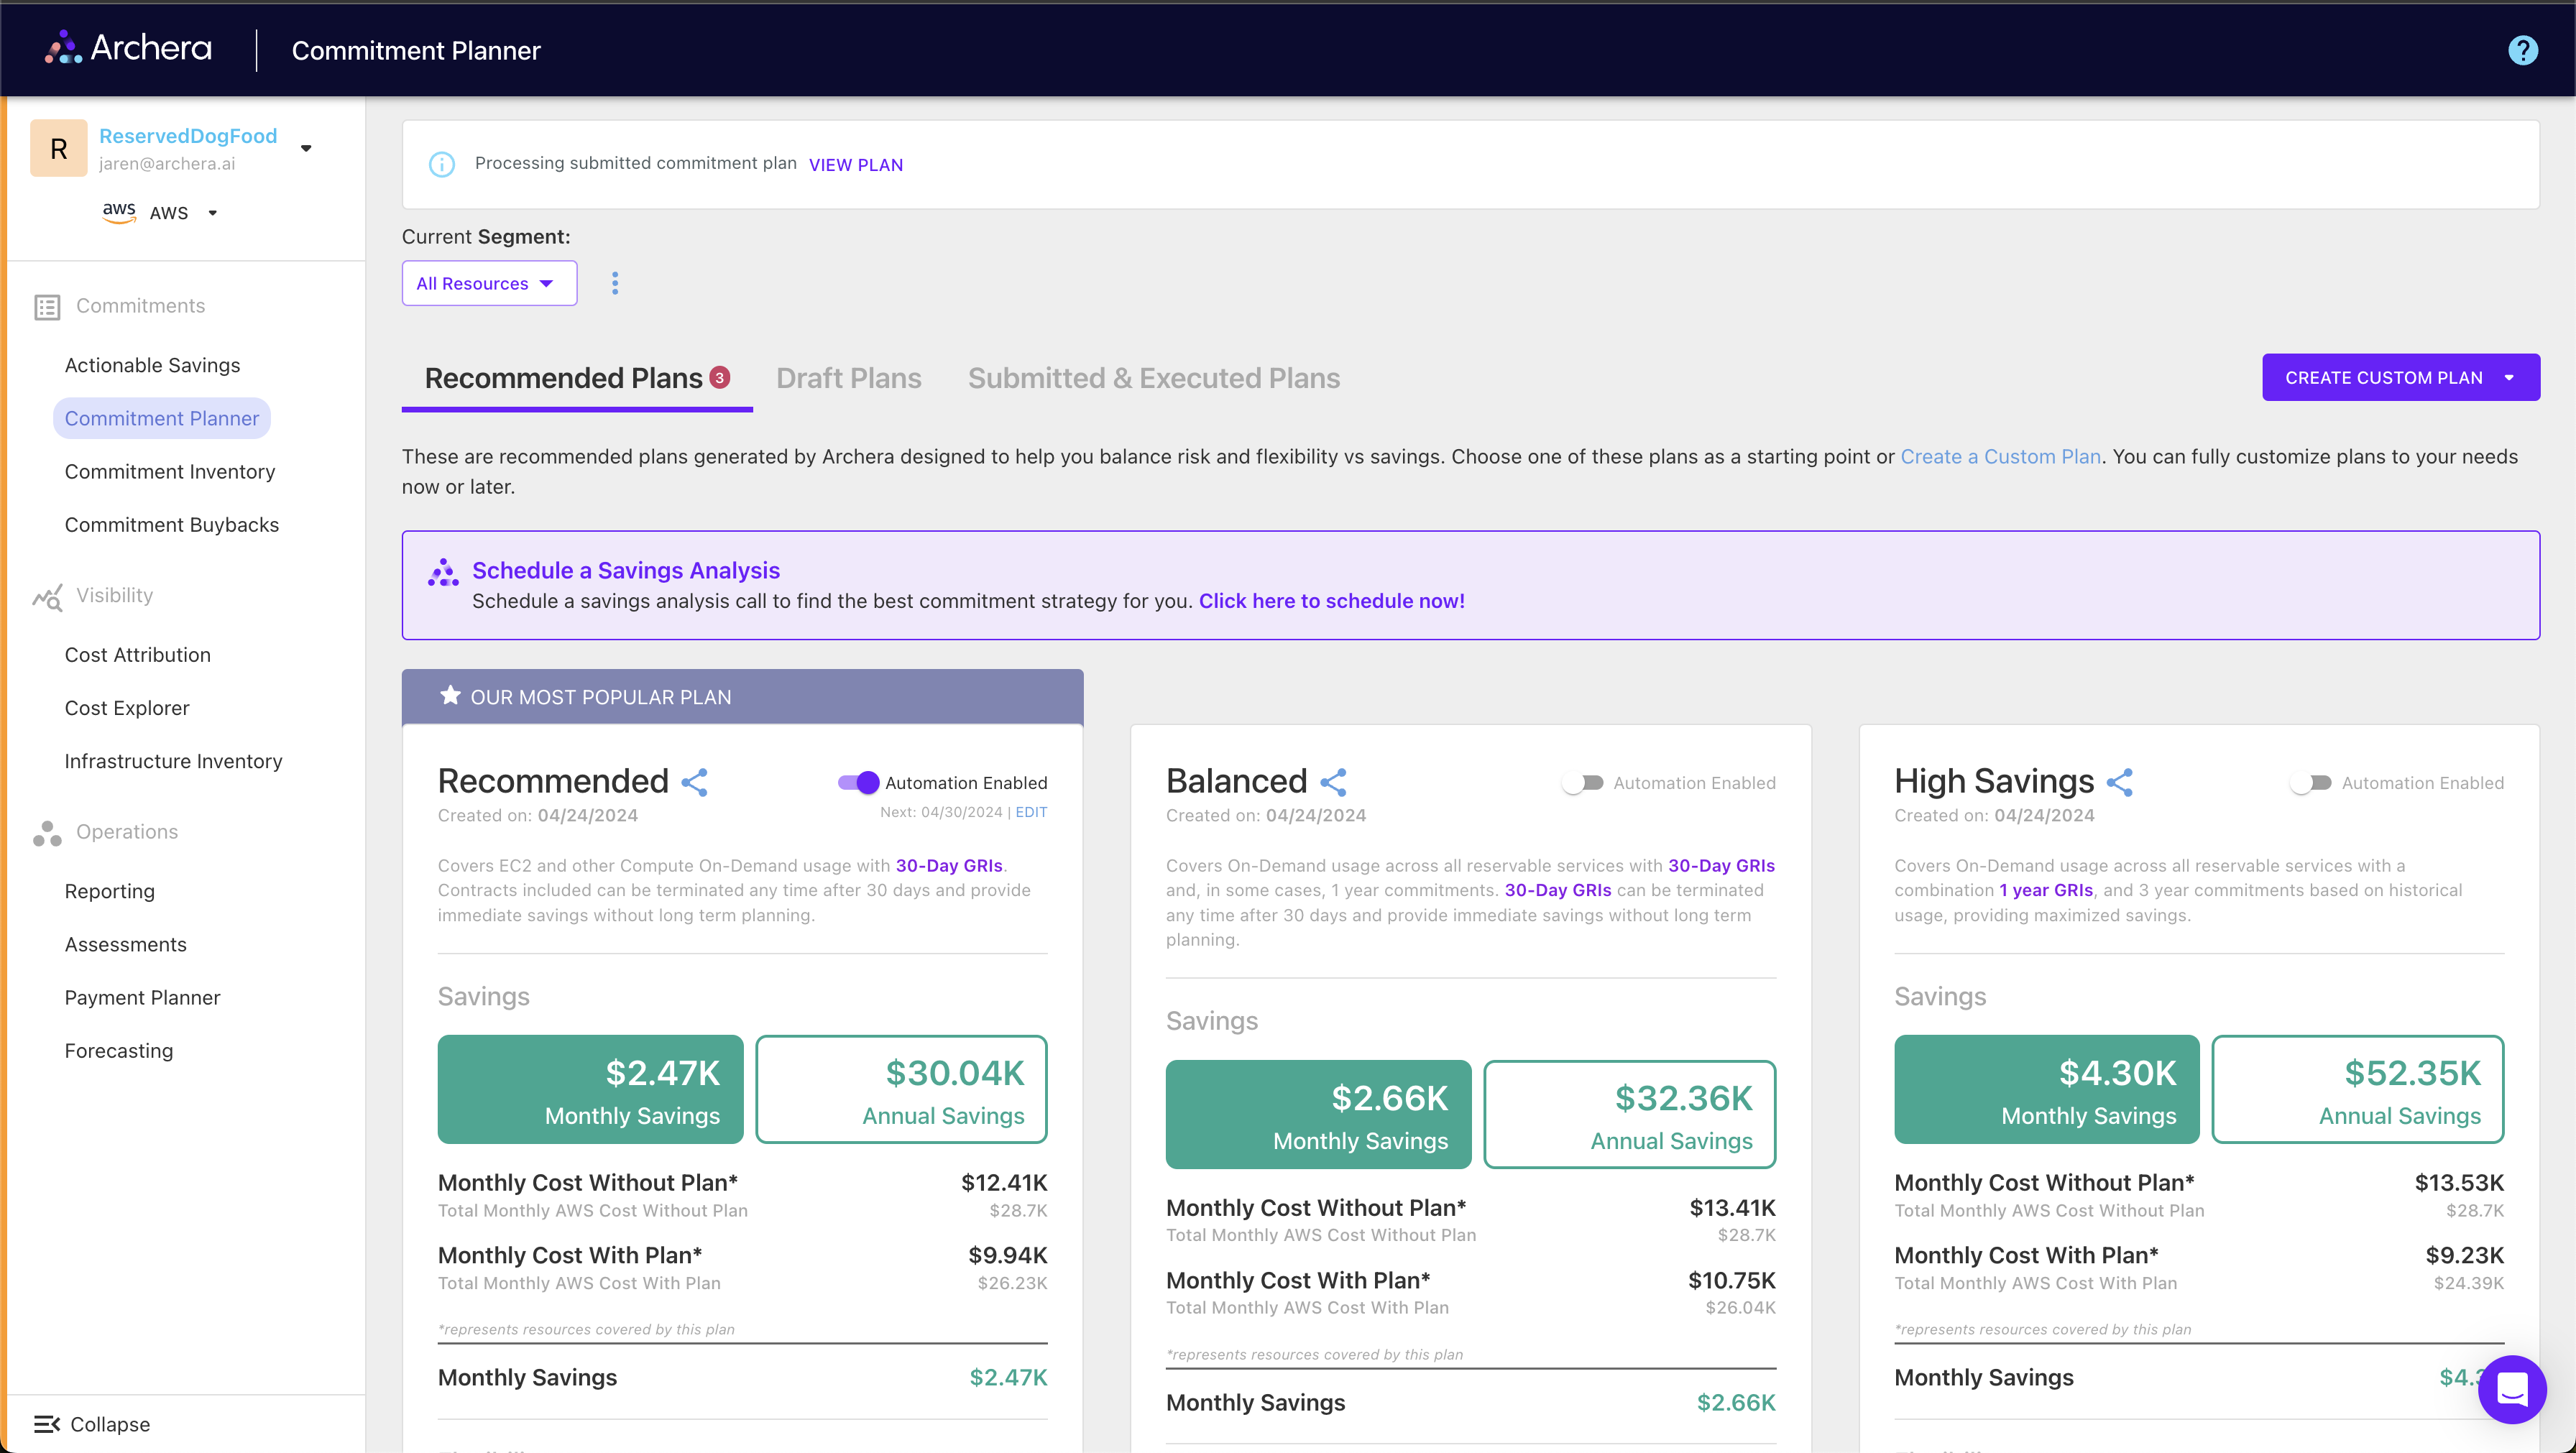
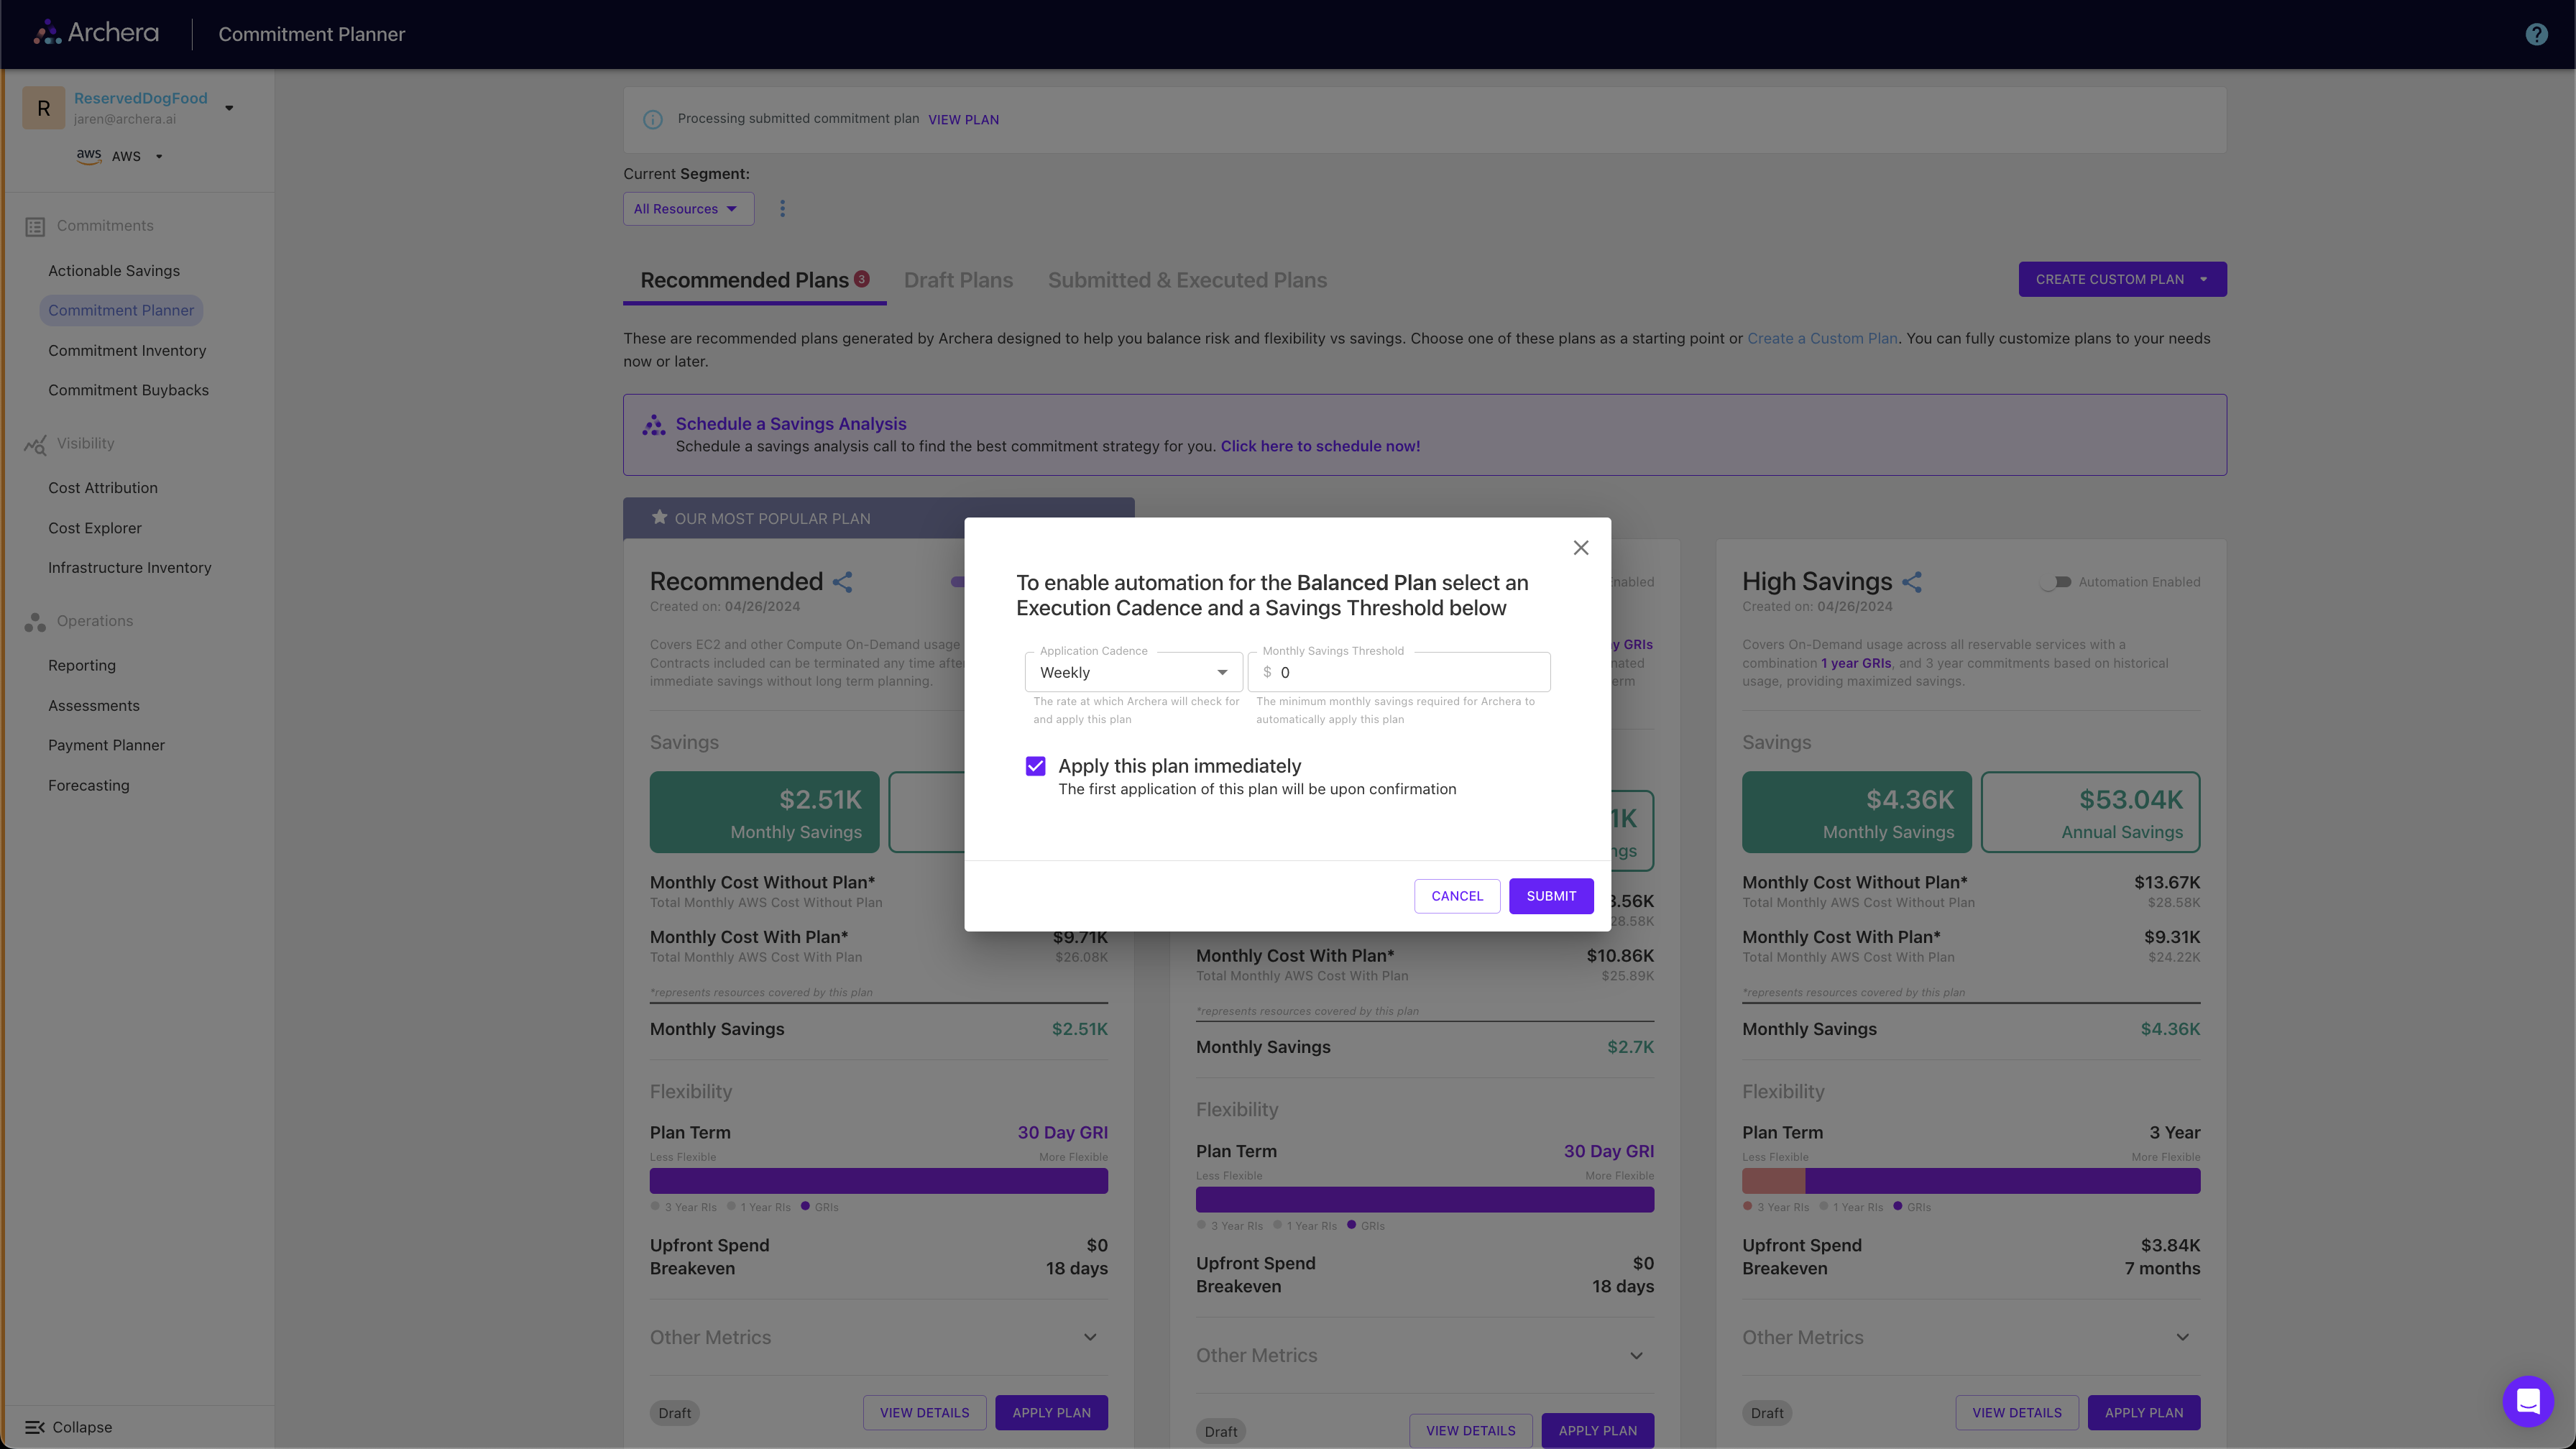
Commitment Planner: Three default strategies (Recommended, Balanced, High Savings)
Cost Dashboard: Overview of your current spending and optimization opportunities
Step 4: Explore Your Savings Opportunities
Immediate Savings Analysis
Your first view will show immediate opportunities to cover on-demand usage with 30-day commitments:
Stop the Bleeding: Identify on-demand resources that should have commitments
Quick Implementation: Apply 30-day commitments for immediate savings
Risk-Free Start: Begin optimization without long-term commitments
Commitment Planner
Explore three pre-configured commitment strategies:

Recommended Plan
Focus: Maximum flexibility with immediate savings
Primarily 30-day guaranteed commitments
Lowest risk, moderate savings
Perfect for getting started
Balanced Plan
Focus: Optimal balance of savings and flexibility
All reservable services included
Mix of 30-day and 1-year commitments
Most popular choice for ongoing optimization
High Savings Plan
Focus: Maximum cost reduction
3-year commitments with upfront payments
Highest savings potential
Reduced flexibility, maximum discounts
Step 5: Implement Your First Plan
Applying a Commitment Plan
Select Your Strategy
Choose from Recommended, Balanced, or High Savings plans
Review Details
Click “View Details” to see specific commitments and covered infrastructure
Customize if Needed
Edit individual line items or create custom plans as desired
Apply Plan
Click “Apply Plan” to implement your chosen strategy and start saving
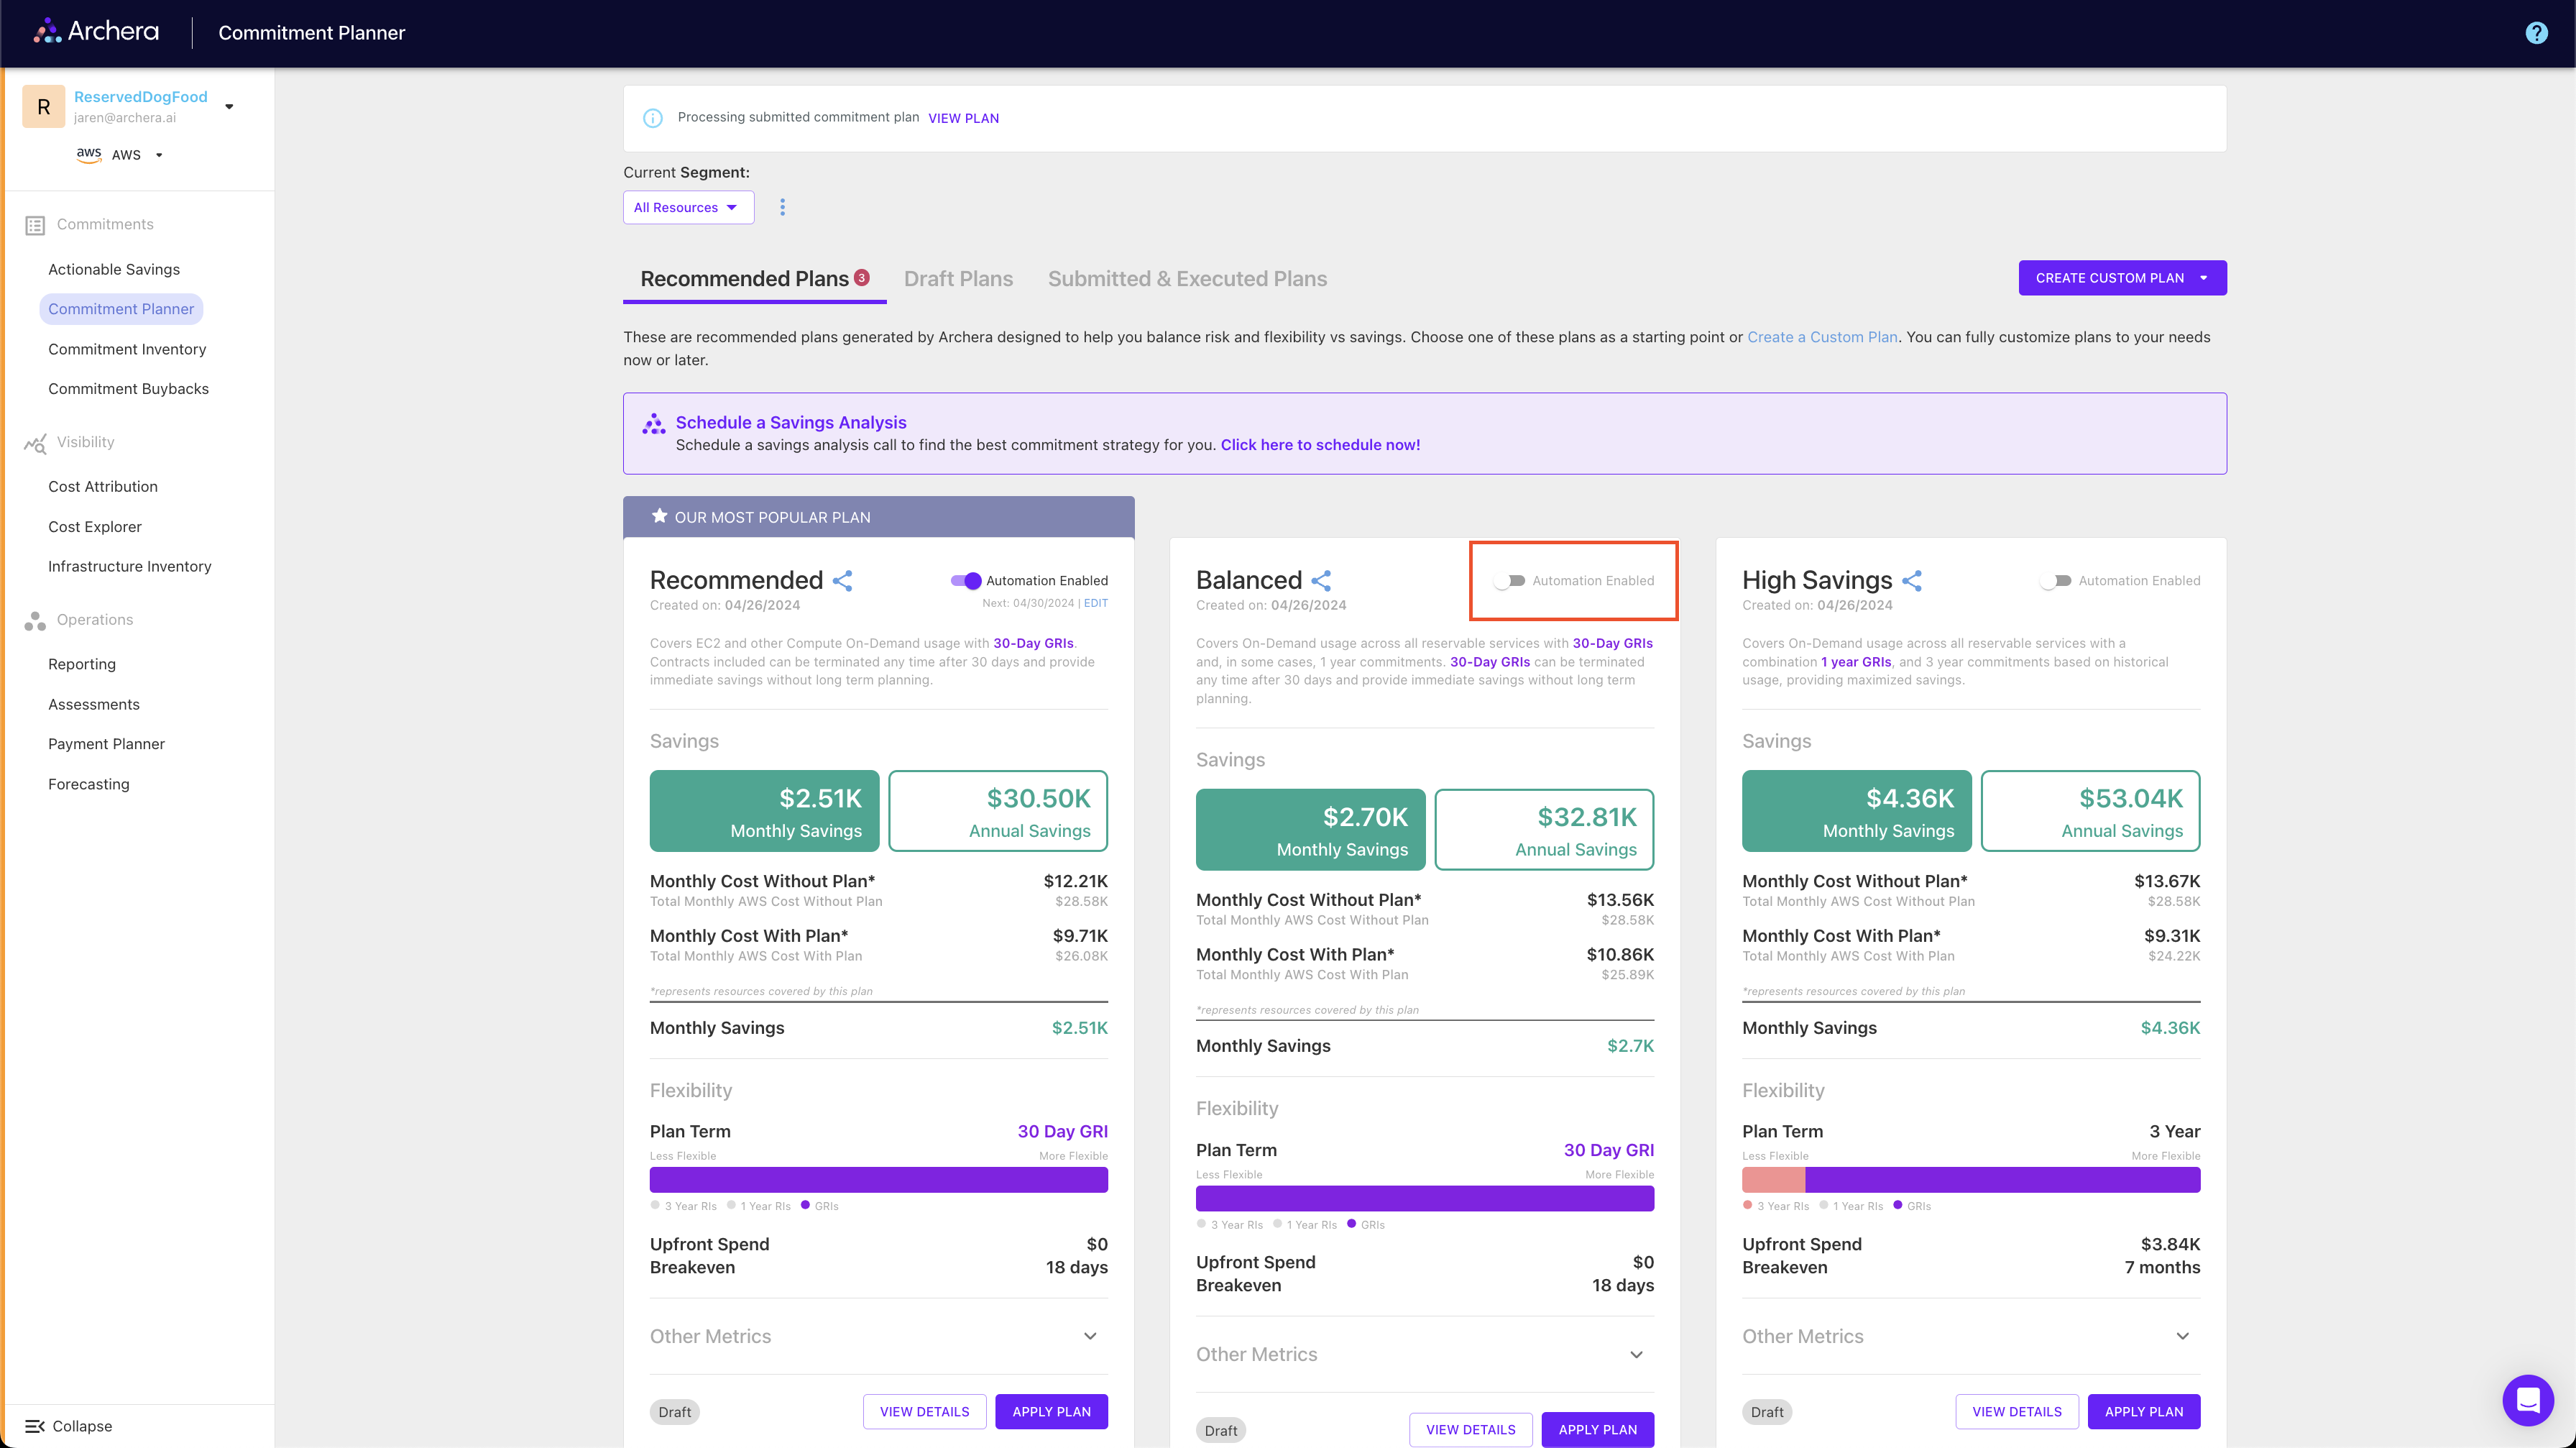
Setting Up Automation (Optional)
Enable automation policies for hands-off optimization:

Configure Thresholds: Set minimum savings amounts to trigger automation
Choose Cadence: Select weekly, monthly, or quarterly evaluation
Monitor Performance: Track automated savings and adjust as needed
Maintain Control: Cancel or modify policies anytime

Step 6: Ongoing Management
Platform Features
Once you’re up and running, take advantage of:
Custom Plan Creation
Build Your Own Strategy
Create plans tailored to your needs
Mix commitment types and terms
Save and share plans with your team
Performance Monitoring
Track Your Success
Monitor utilization and savings
View breakeven timelines
Analyze coverage across services
Team Collaboration
Multi-User Support
Invite team members
Set permissions and roles
Share plans and reports
API Integration
Programmatic Access
REST API for custom integrations
Export data for reporting
Automate workflows
Best Practices
Start Small: Begin with 30-day commitments to understand the platform
Monitor Regularly: Review savings and utilization weekly
Use Automation: Enable policies once comfortable with manual optimization
Plan Ahead: Consider business changes when selecting commitment terms

Security and Compliance
Archera maintains enterprise-grade security:
SOC 2 Type II Compliance: Audited security controls and processes
Least Privilege Access: Minimal required permissions for cost optimization
No Data Storage: Cost data processed in real-time, not stored
Encryption: All data transmitted using industry-standard encryption
Free Platform: Archera’s platform is completely free to use. Connection is purely to access billing data for accurate recommendations. There are no hidden fees, and you keep 100% of your optimized savings. Full platform access is available 24-48 hours after connecting your cloud account.
Last updated
Was this helpful?